
Are you experiencing problems with your vertical load washing machine and need to diagnose or repair it? Disassembling the machine may be necessary to access the faulty parts and fix them. However, the thought of disassembling a complex appliance can be intimidating for many people. Don’t worry – we’re here to help! In this step-by-step guide, we will walk you through the process of disassembling a vertical load washing machine, ensuring that you can accomplish the task with ease and confidence.
Step 1: Preparation
Before you start disassembling your washing machine, it is crucial to ensure your safety. Begin by unplugging the machine from the power source to avoid electrocution. Additionally, have the necessary tools and equipment ready, such as screwdrivers, pliers, and a wrench. It is also a good idea to have a tray or a bowl nearby for keeping small parts organized.
Step 2: Accessing the Control Panel
To access the control panel, start by removing any screws or clips holding it in place. Carefully pull the control panel forward and disconnect any wires or connectors, ensuring they are labeled for reassembly. Set the control panel aside in a safe place, making sure not to damage any wires or components.
Step 3: Removing the Cabinet
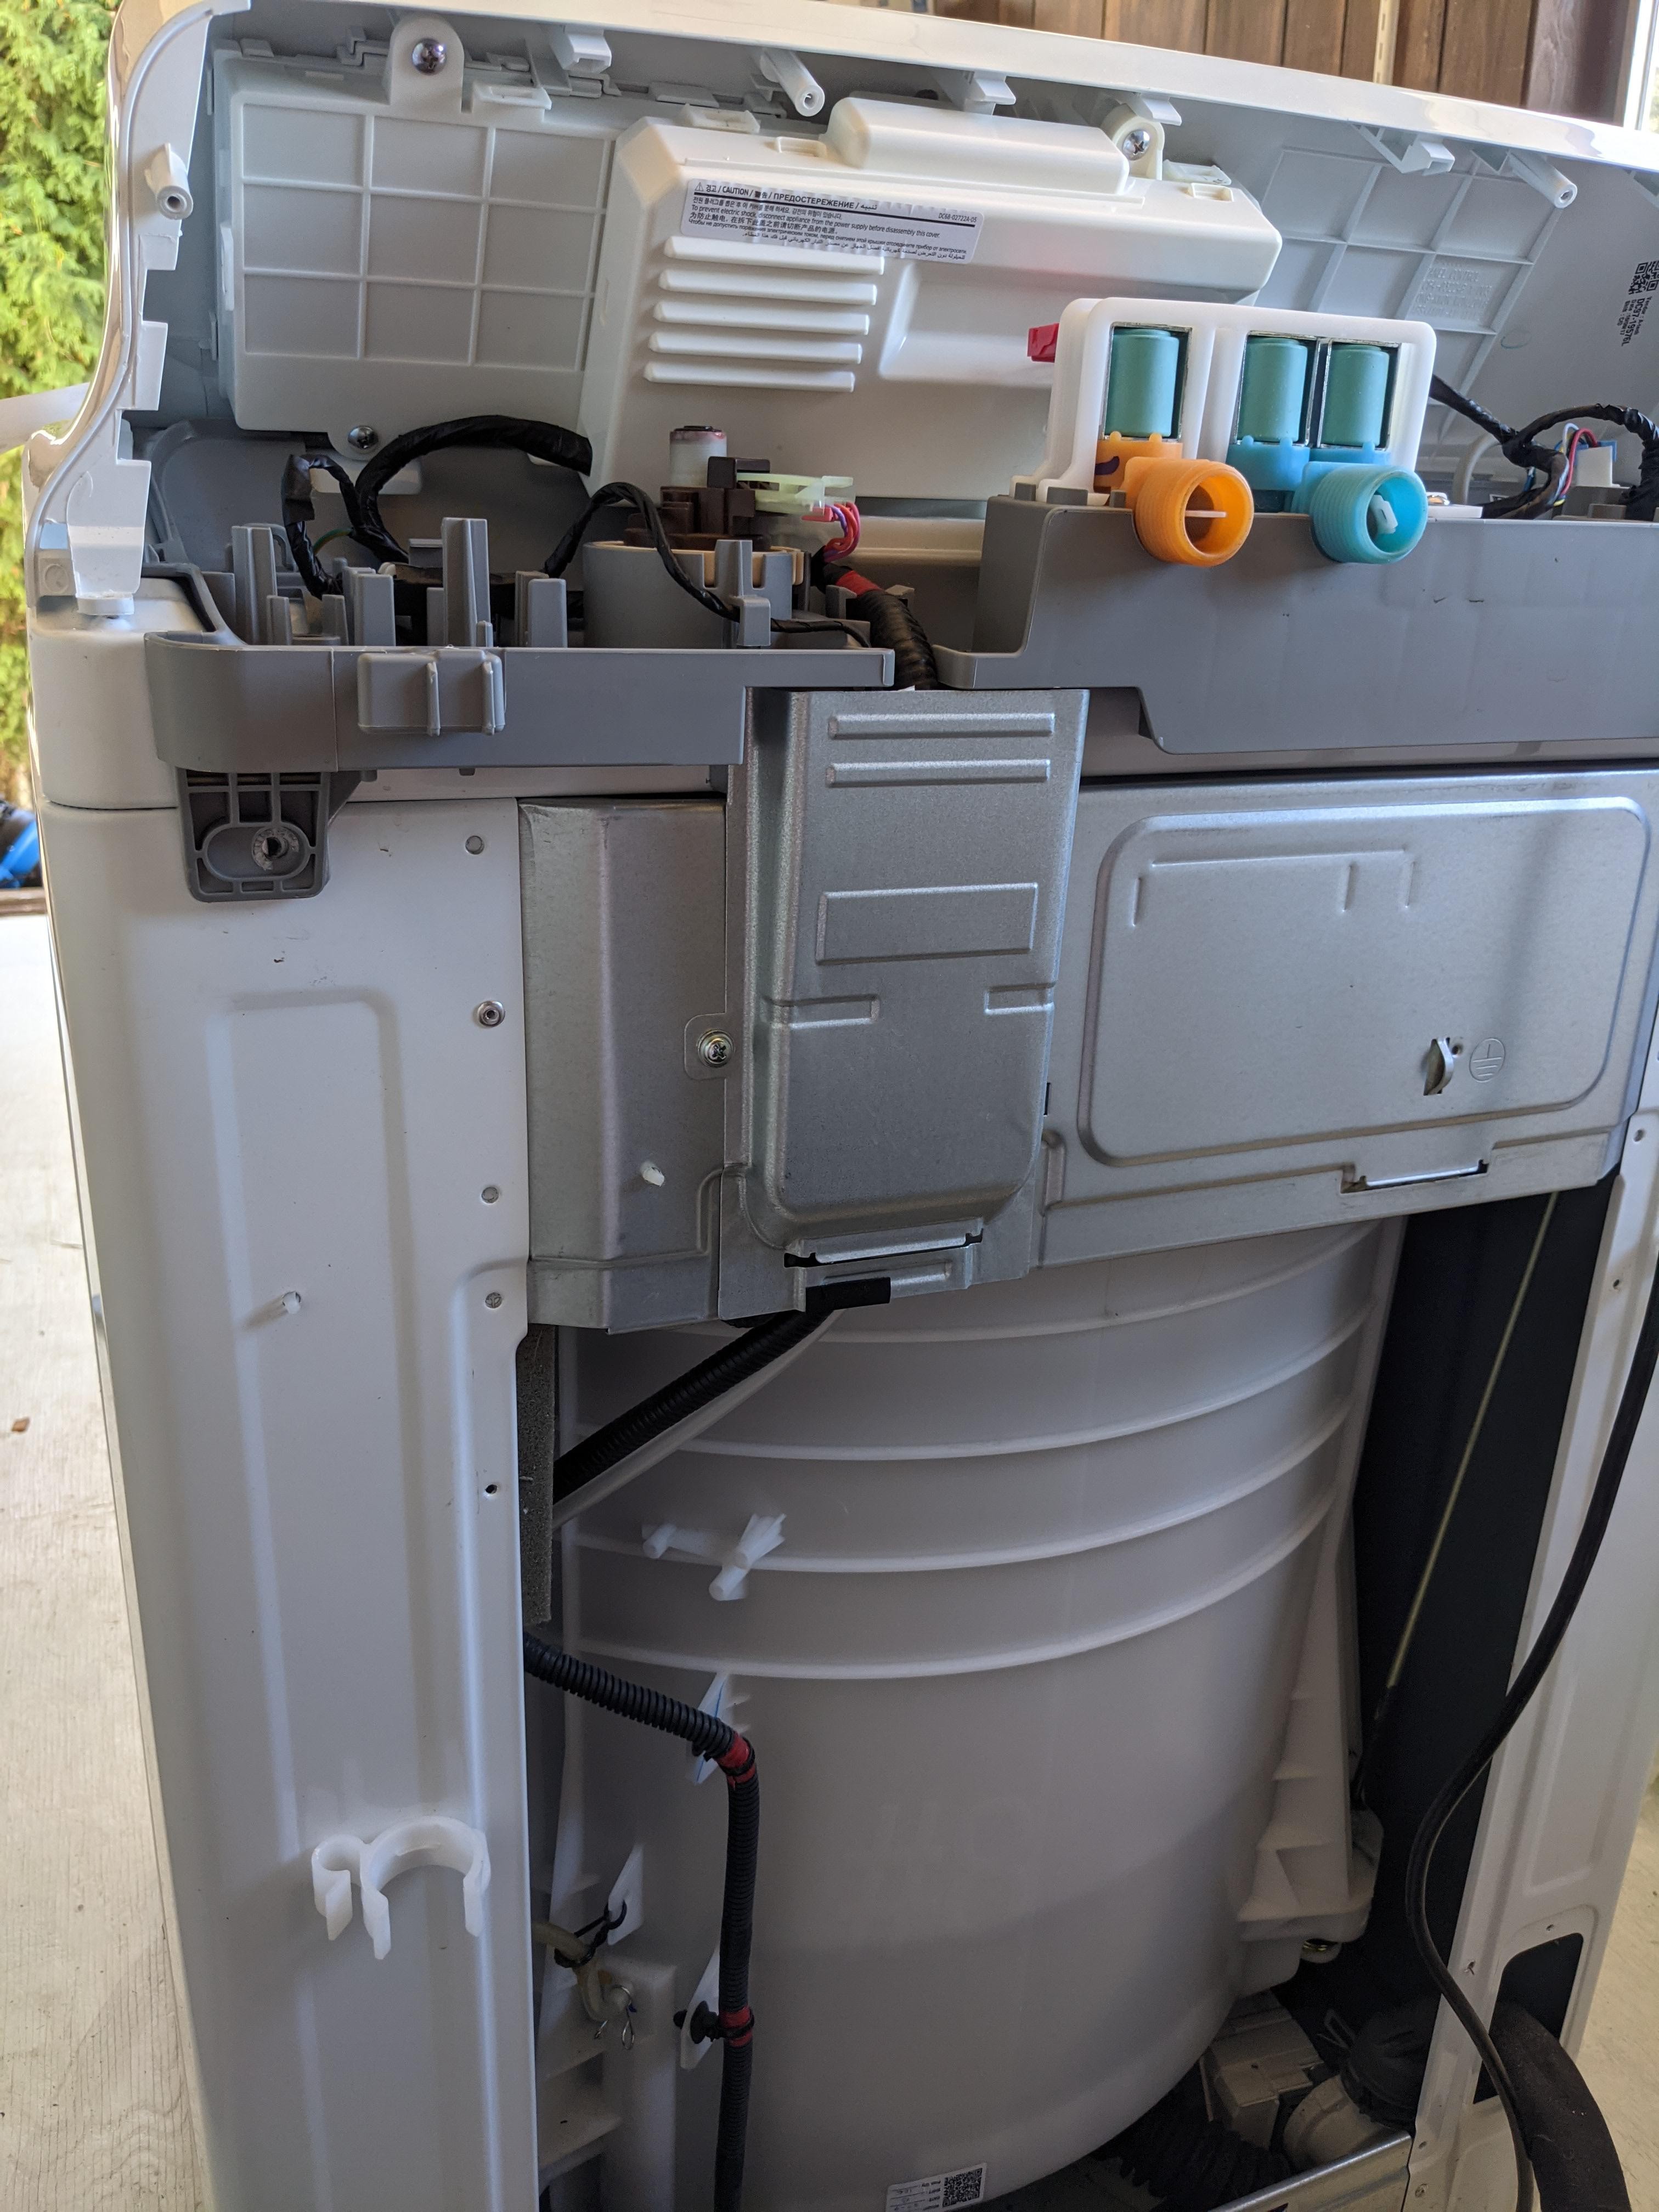
Next, you will need to remove the cabinet to gain access to the inner components of the washing machine. Locate and remove the screws or clips securing the cabinet to the back panel. Once all screws are removed, tilt the cabinet forward and slide it off from the base of the machine. Be cautious while removing the cabinet, as it may be heavy.
Remember to follow the manufacturer’s instructions, as the disassembly process may vary slightly depending on your specific washing machine model. If you are unsure or uncomfortable with any steps, it is advisable to consult a professional technician.
By following these steps, you will be able to dismantle your vertical load washing machine successfully. Remember to take your time, stay organized, and exercise caution throughout the process. With some patience and the right tools, you’ll be able to diagnose and repair your washing machine efficiently, saving time and money on professional repairs. Best of luck!
- Step 1: Preparation
- Step 2: Unplug the Washing Machine
- Why is it important to unplug the washing machine?
- Additional precautions:
- Step 3: Remove the Control Panel
- Step 4: Disconnect the Electrical Connections
- Step 5: Remove the Rear Panel
- Tools you will need:
- Instructions:
- Step 6: Detach the Drum and Agitator
- Step 7: Disassemble the Pump and Motor
- Video on the topic
- I MADE A HUGE MISTAKE! Whirlpool Washer STILL Out Of Balance, see what happened.
- Answers to frequently asked questions
Step 1: Preparation
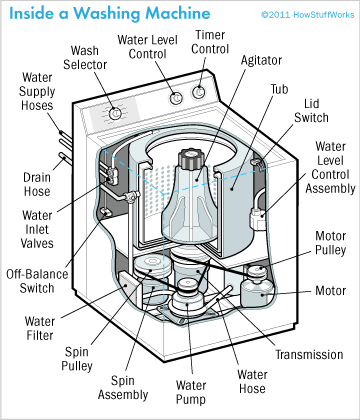
Before you begin disassembling your vertical load washing machine, it is important to gather all the necessary tools and materials. This will help ensure a smooth and efficient disassembly process. Here is a list of items you will need:
| Tools | Materials |
|---|---|
| Phillips screwdriver | Tape measure |
| Flathead screwdriver | Plastic bags |
| Adjustable wrench | Marker or pen |
| Pliers | Cleaning solution |
| Bucket or basin | Lint-free cloth |
Make sure to have these tools and materials readily available before you start disassembling the washing machine. This will save you time and prevent any delays during the process. Additionally, it is also a good idea to familiarize yourself with the layout and components of your specific washing machine model. You can consult the manufacturer’s manual or online resources for this information.
By being prepared and having the necessary tools and materials at hand, you can ensure a successful disassembly process and avoid any unnecessary complications. Once you have everything you need, you can proceed to the next step of disassembling your vertical load washing machine.
Step 2: Unplug the Washing Machine
Before starting any disassembly, it is crucial to unplug the washing machine from the power source. This is necessary to avoid any potential electric shock or injury during the disassembly process.
To unplug the washing machine, locate the power cord at the back of the machine. Follow the cord to the wall outlet and gently pull it out of the socket.
Make sure to handle the power cord carefully to prevent any damage, such as fraying or bending. If you notice any damage to the cord, it is essential to replace it before proceeding further.
Why is it important to unplug the washing machine?
Unplugging the machine ensures your safety and prevents any potential accidents. Working on a powered appliance, especially one that involves water, can be extremely dangerous as it increases the risk of electrical shock. Therefore, it is important to always unplug the washing machine before attempting any repairs or disassembly.
Additional precautions:
Use caution: Even when the washing machine is unplugged, it is still important to exercise caution while disassembling. Components such as sharp edges or heavy parts may pose a risk, so always handle them carefully to avoid injury.
Avoid water contact: Never attempt to disassemble a washing machine when it is still wet or has recently been used. Water can conduct electricity, increasing the risk of electrical shock. Wait for the machine to dry completely before proceeding.
By following these precautions and unplugging the washing machine, you ensure a safe and efficient disassembly process.
Step 3: Remove the Control Panel

Removing the control panel is the next step in disassembling a vertical load washing machine. Follow these instructions carefully to safely remove the control panel:
Step 1: Unplug the washing machine from the power source to ensure your safety.
Step 2: Locate the screws or securing clips on the back of the control panel.
Step 3: Use a screwdriver or a pry tool to remove the screws or pry open the securing clips.
Step 4: Carefully lift the control panel up and away from the machine’s body.
Note: Some control panels may have additional clips or connectors that need to be disconnected before removal. Refer to your washing machine’s user manual for specific instructions.
Once the control panel is removed, you will have access to the inner mechanisms of the washing machine and can proceed with further disassembly if necessary.
Step 4: Disconnect the Electrical Connections

Before proceeding with disassembling your vertical load washing machine, make sure to disconnect the electrical connections to avoid any potential accidents. Follow these steps to safely disconnect the electrical connections:
- Power off the machine: Locate the power switch on your washing machine and turn it off. You can also unplug the machine from the power socket to ensure it is completely disconnected from the electrical supply.
- Remove the control panel: In order to access the electrical connections, you will need to remove the control panel. This can usually be done by unscrewing a few screws or using a screwdriver to pry it off gently.
- Identify the electrical connections: Look for the various electrical connections that are attached to the control panel. These may include wires, connectors, or terminal blocks.
- Disconnect the connections: Carefully and gently disconnect each electrical connection by pulling them apart or using a tool, such as pliers or a screwdriver, depending on the type of connection.
- Label the connections: To make reassembly easier, consider labeling each disconnected electrical connection. You can use adhesive labels or markers to mark each connection with its corresponding location.
- Secure the disconnected electrical connections: After disconnecting the electrical connections, ensure that they are secured and do not pose a risk of coming into contact with any moving parts or water during the disassembling process.
By following these steps, you will safely disconnect the electrical connections of your vertical load washing machine, allowing you to proceed with the disassembly process efficiently and effectively.
Step 5: Remove the Rear Panel
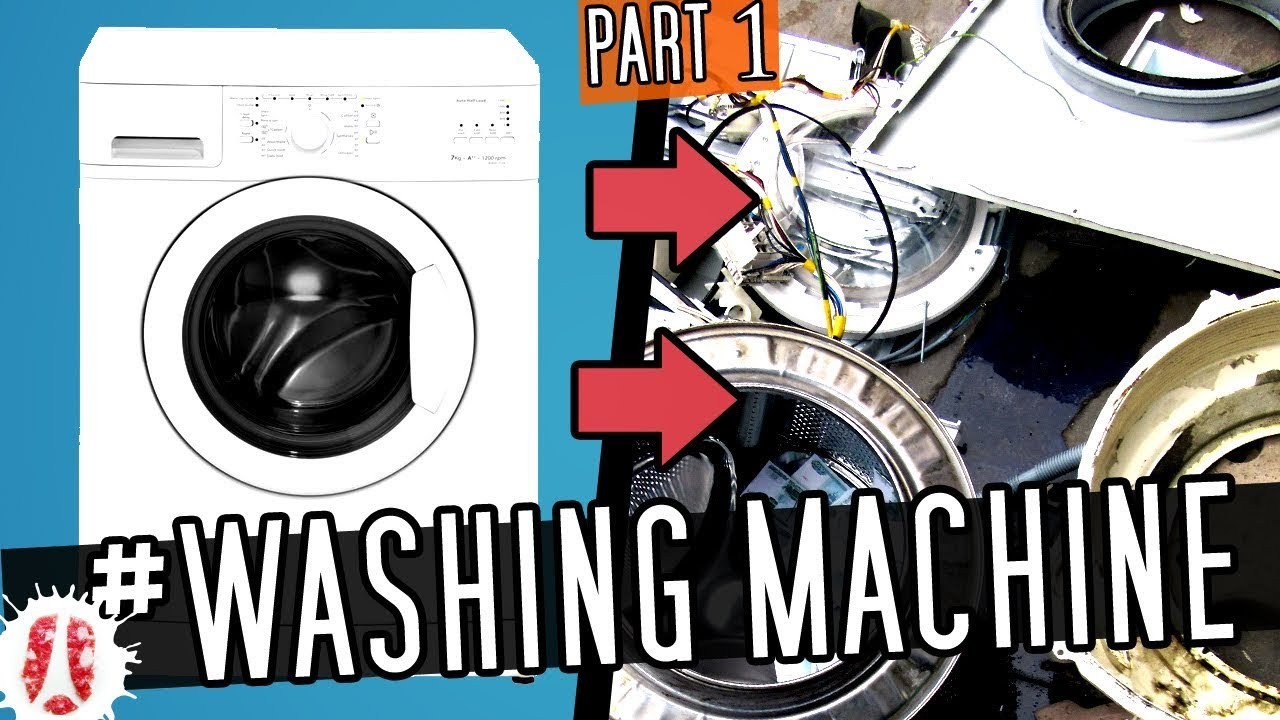
Removing the rear panel of your vertical load washing machine is an essential step in the disassembly process. This panel provides access to various components of the machine and is necessary for further disassembly.
Tools you will need:
Before you begin, gather the following tools:
- Phillips screwdriver
- Flathead screwdriver
- Socket wrench
- Pliers
Instructions:
Follow these steps to remove the rear panel:
| Step 1 | Disconnect the washing machine from the power source to ensure your safety. |
| Step 2 | Locate the screws that secure the rear panel to the main body of the washing machine. These screws are typically located along the edges of the panel. |
| Step 3 | Using a Phillips screwdriver, carefully remove the screws and set them aside. Be sure to keep track of the screws so you can easily reassemble the machine later. |
| Step 4 | Once all the screws have been removed, gently pull the rear panel away from the main body of the washing machine. Take care not to damage any wires or hoses that may be connected to the panel. |
| Step 5 | Set the rear panel aside in a safe place where it won’t get damaged. |
With the rear panel removed, you now have access to the inner components of your vertical load washing machine. You can continue disassembling the machine according to the specific repair or maintenance task you need to perform.
Remember to always consult the manufacturer’s instructions or seek professional help if you are unsure about any step of the disassembly process.
Step 6: Detach the Drum and Agitator
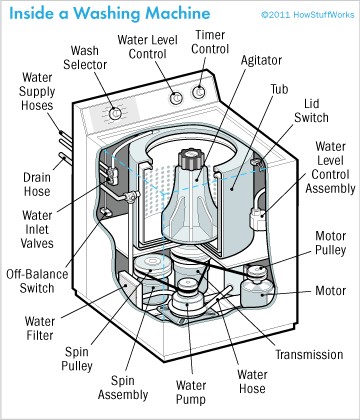
Now that you have removed the front and back panels of the washing machine, it’s time to detach the drum and agitator. This step is crucial if you need to replace any part of the drum or agitator or clean them thoroughly.
Start by locating the bolt or screw that holds the agitator in place. It is usually located in the center of the agitator and may require a socket wrench or screwdriver to loosen it. Once you loosen the bolt or screw, gently lift the agitator out of the washing machine.
Next, focus on the drum. Check around the drum for any screws or clips that need to be removed. Depending on the make and model of your washing machine, these attachments may be located on the top or sides of the drum. Use the appropriate tools to remove them.
Once you have removed the attachments, you can carefully lift the drum out of the washing machine. It may be helpful to have a second person assist you with this step, as the drum can be quite heavy.
Be cautious while handling the drum and agitator, as they can be fragile and easily damaged. Place them in a safe location where they won’t be knocked over or mishandled.
Now that the drum and agitator are detached, you have successfully disassembled your vertical load washing machine. This step-by-step guide will help you in repairing or cleaning various parts of your machine.
Step 7: Disassemble the Pump and Motor
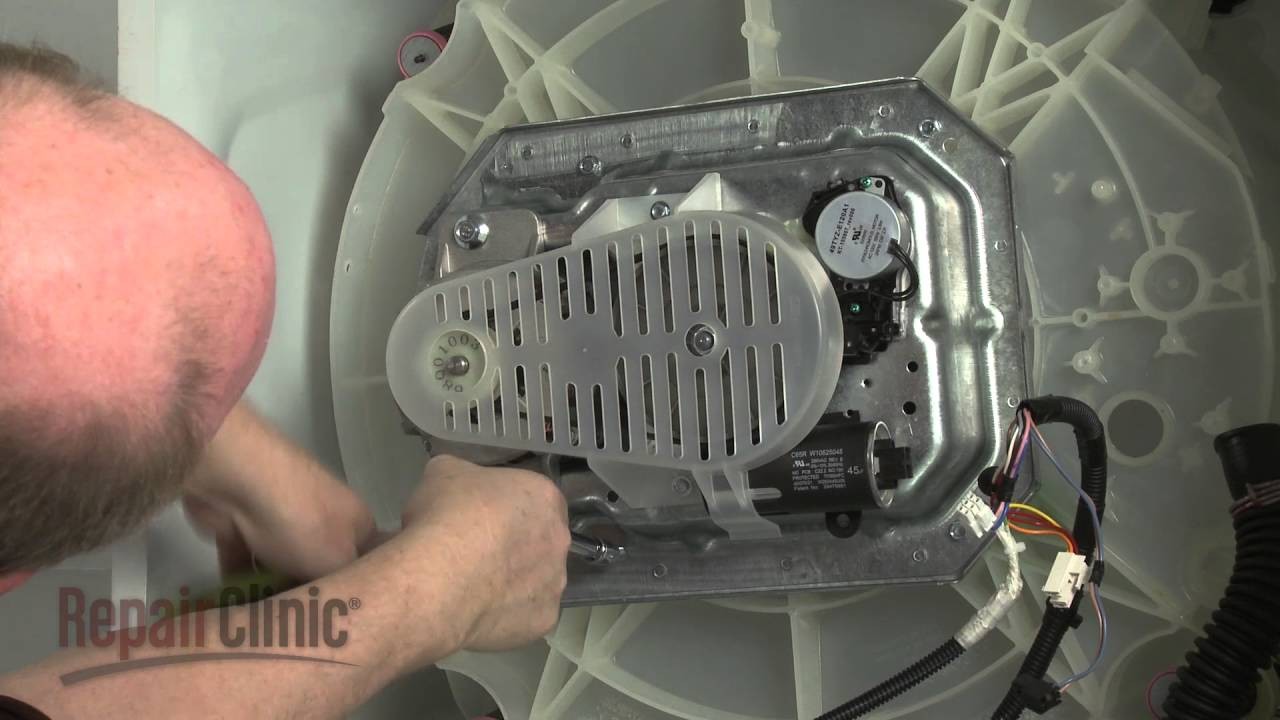
Now that you have removed the outer housing and control panel of the washing machine, it is time to disassemble the pump and motor. The pump and motor are responsible for draining the water and spinning the drum, respectively, so it’s essential to handle them with care.
To start, locate the pump at the bottom of the machine. It is usually connected to the drain hose. Disconnect the electrical connections and any mounting bolts that may be holding it in place. Once detached, carefully remove the pump from its housing.
Next, move on to the motor, which is usually connected to the drum by a belt or a direct drive mechanism. Disconnect any electrical connections to the motor and remove any screws or bolts securing it to the machine. Once loose, gently pull the motor away from the drum, being mindful not to damage any surrounding components.
After the pump and motor are detached, take a moment to inspect them for any signs of wear or damage. Look for any obvious issues like broken wires or rusted parts. If necessary, replace any faulty components to ensure optimal performance.
Remember to keep track of all screws and other small parts as you go, so you can easily reassemble the machine later. It’s a good idea to take pictures or make notes to help you remember the order and positioning of each component.
With the pump and motor disassembled, you are one step closer to gaining a complete understanding of how your vertical load washing machine functions. Stay tuned for the final step of the disassembly process!
Video on the topic
I MADE A HUGE MISTAKE! Whirlpool Washer STILL Out Of Balance, see what happened.
Answers to frequently asked questions
Read more practical tips and expert opinions about modern devices at appliances-news.com. Here you will find answers to questions about any technology.


