Regular maintenance of your washing machine is essential to keep it running smoothly and efficiently. One of the key components that might require attention is the brushes. The brushes in your washing machine’s motor play a vital role in its operation and can wear down over time.
In this article, we will guide you through the process of checking and replacing the brushes on your washing machine, ensuring its longevity and optimal performance.
First, it’s important to understand why the brushes in your washing machine are so crucial. The brushes are responsible for conducting electricity to the motor, which then powers the drum to rotate and wash your clothes. However, constant friction between the brushes and the motor can cause them to wear down and eventually require replacement.
To check if your washing machine’s brushes need to be replaced, start by unplugging the machine and removing the back panel. Locate the motor, which is usually situated at the bottom of the machine. You should see two brushes on either side of the motor. Examine them closely – if they appear significantly shorter than when they were new, it’s time to replace them.
When it comes to replacing the brushes, it’s important to choose the right ones for your specific washing machine model. Consult the manufacturer’s instructions or the machine’s manual to identify the correct brushes needed. Once you have the replacement brushes, carefully remove the old ones by gently pulling them out of their holders. Take note of the position and orientation of the old brushes to ensure proper installation of the new ones.
Insert the new brushes into their respective holders, making sure they are securely in place. Put the back panel back on and plug the machine back in. Test the washing machine to confirm that the new brushes are functioning correctly. If the machine runs smoothly and without any issues, you have successfully replaced the brushes.
By regularly checking and replacing the brushes in your washing machine, you can avoid potential motor damage and costly repairs. Remember to consult the manufacturer’s guidelines to ensure you choose the right brushes for your machine, and be cautious during the replacement process to prevent any mishaps. With proper attention and maintenance, your washing machine will continue to keep your clothes clean for years to come.
- Understanding the Importance of Brush Maintenance
- Steps to Check the Condition of Brushes
- Step 1: Disconnect the Washing Machine
- Step 2: Locate the Brushes
- Step 3: Remove the Brushes
- Step 4: Inspect the Brushes
- Step 5: Measure the Brush Length
- Step 6: Reinstall or Replace the Brushes
- Signs of Worn-out Brushes
- Steps to Replace Brushes on a Washing Machine
- 1. Safety first
- 2. Access the brushes
- 3. Remove the old brushes
- 4. Install the new brushes
- 5. Reassemble the washing machine
- 6. Test the machine
- Tips for Prolonging the Lifespan of Brushes
- Video on the topic
- A Massive Winter Update – Severe Cold and Major East Coast Snowstorms!
- How to Replace the Carbon Brushes on a Washing Machine (Hoover)
- Carbon brushes logic washing machine
- How to Replace Carbon Brushes on a Washing Machine (Bosch)
- Answers to frequently asked questions
Understanding the Importance of Brush Maintenance
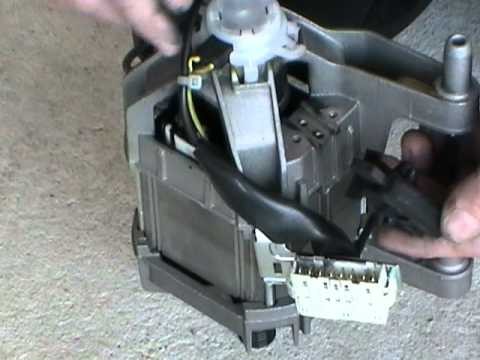
Brush maintenance is a critical aspect of ensuring the proper functioning and longevity of your washing machine. The brushes in your washing machine’s motor are responsible for transferring electrical current to the motor’s rotor, enabling it to turn and power the machine. Over time, these brushes can wear down or become damaged, leading to decreased performance and potential motor failure.
Regularly checking and replacing the brushes on your washing machine is essential for several reasons. First and foremost, worn-out or damaged brushes can cause excessive sparking or arcing, leading to electrical issues and even fires. By keeping the brushes in good condition, you can minimize the risk of electrical hazards and ensure the safety of your home.
In addition to safety concerns, maintaining the brushes can also improve the overall performance of your washing machine. When brushes wear down, they may not make proper contact with the motor’s rotor, resulting in decreased power and efficiency. By replacing the brushes as needed, you can restore optimal performance and ensure that your washing machine operates at its best.
Furthermore, neglecting brush maintenance can lead to costly repairs or even the need for a new washing machine altogether. Damaged brushes can put excessive strain on the motor, causing it to overheat and potentially fail. By regularly inspecting and replacing the brushes, you can prevent costly breakdowns and extend the lifespan of your washing machine.
To effectively maintain the brushes, it is essential to clean them regularly and inspect for any signs of wear or damage. It is recommended to replace the brushes every few years or as soon as any issues arise. By staying proactive with brush maintenance, you can ensure the longevity, performance, and safety of your washing machine for years to come.
In conclusion, brush maintenance is a crucial aspect of keeping your washing machine in optimal condition. By understanding the importance of regular inspections and replacements, you can prevent electrical hazards, improve performance, and extend the lifespan of your washing machine.
Steps to Check the Condition of Brushes
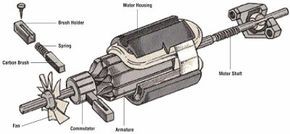
To properly check the condition of the brushes on your washing machine, follow these steps:
Step 1: Disconnect the Washing Machine
Before beginning any maintenance or repair work, it is crucial to disconnect the washing machine from its power source. This will ensure your safety during the inspection process.
Step 2: Locate the Brushes
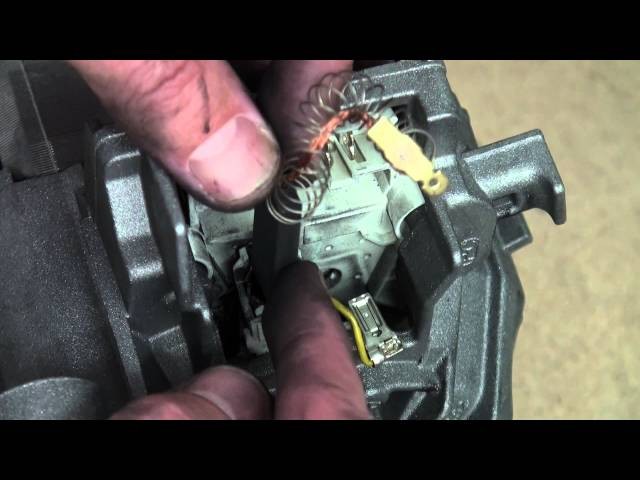
The brushes on a washing machine are typically located near the motor. They may be secured with screws or clips. Consult your washing machine’s manual to find the exact location of the brushes.
Step 3: Remove the Brushes
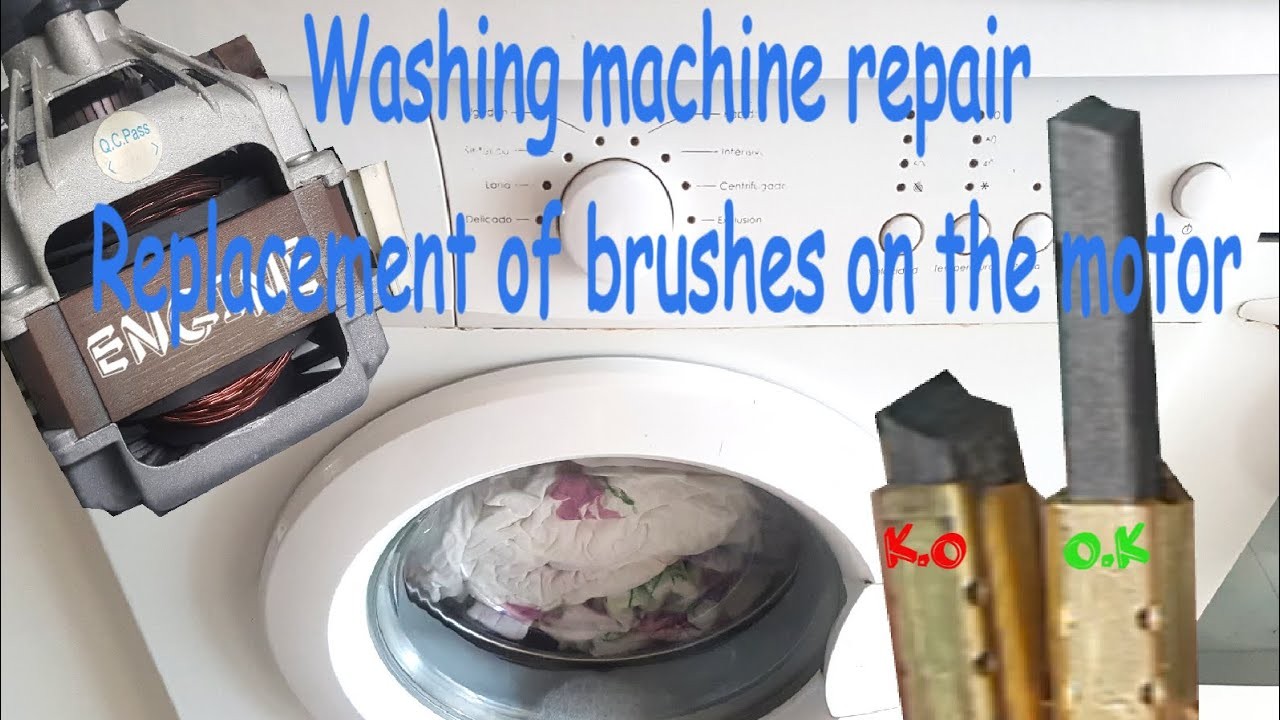
Once you have located the brushes, carefully remove them from their holders. Pay attention to the position and orientation of the brushes, as they need to be reinstalled correctly if they are found to be worn or damaged.
Step 4: Inspect the Brushes
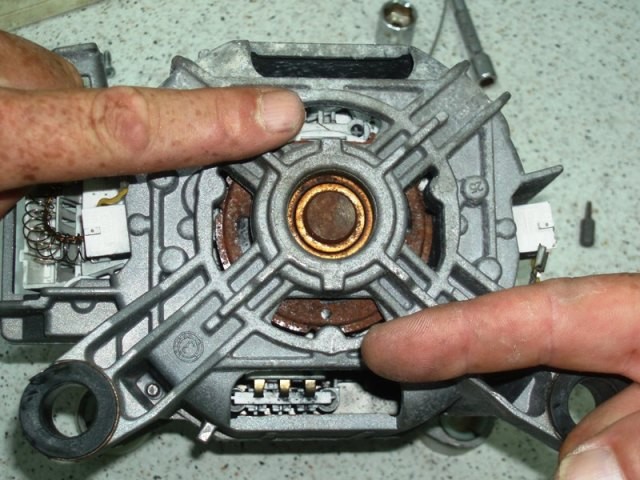
Inspect the brushes for any signs of wear or damage. Look for fraying or uneven wear on the brush bristles. If the brushes appear worn down and have shorter bristles, it is an indication that they need to be replaced.
Step 5: Measure the Brush Length
Using a ruler or measuring tape, measure the length of the brushes. Compare it to the manufacturer’s specifications to determine if they are within the acceptable range. If the brushes are shorter than the recommended length, they should be replaced.
Step 6: Reinstall or Replace the Brushes

If the brushes are found to be in good condition and within the acceptable range, reinstall them back into their holders. Make sure they are securely attached. However, if the brushes are worn or damaged, it is recommended to replace them with new ones.
By following these steps, you can effectively check the condition of the brushes on your washing machine. Regular inspection and maintenance of the brushes will ensure optimal performance and extend the lifespan of your washing machine.
Signs of Worn-out Brushes

The brushes in a washing machine are crucial components that help power the motor and ensure proper functioning. Over time, these brushes can become worn-out and need to be replaced. Here are some signs to look out for that indicate your washing machine brushes may be worn-out:
| 1. Poor Performance: | If your washing machine is not cleaning clothes as effectively as before or the drum is not spinning as it should, it could be a sign of worn-out brushes. The brushes may not be making proper contact with the motor, resulting in reduced performance. |
| 2. Noisy Operation: | Worn-out brushes can cause increased noise during operation. If you notice unusual sounds, such as grinding or scraping noises, it could indicate that the brushes are not working properly and need to be replaced. |
| 3. Sparking: | If you see sparking around the motor of your washing machine, it is a clear sign of worn-out brushes. The brushes may be worn down to the point where they are no longer making solid contact with the motor, causing sparking and potentially leading to further damage. |
| 4. Excessive Carbon Dust: | If you notice excessive carbon dust near the motor or inside the washing machine, it could be a sign that the brushes need to be replaced. As the brushes wear down, they can produce carbon dust, which may indicate that they are close to failure. |
| 5. Erratic or Intermittent Functioning: | Worn-out brushes can cause irregular or intermittent functioning of the washing machine. If the machine starts and stops abruptly, or if it fails to start at all, it could be due to worn-out brushes that are no longer able to provide a consistent electrical connection. |
If you observe any of these signs, it is important to check and replace the brushes on your washing machine as soon as possible to prevent further damage and ensure optimal performance.
Steps to Replace Brushes on a Washing Machine

Replacing the brushes on your washing machine is a relatively simple process that can help extend the lifespan of your appliance. Here are the steps to follow:
1. Safety first

Before starting any work on your washing machine, ensure that it is disconnected from the power supply. This will help to prevent any potential accidents or electrical shocks.
2. Access the brushes
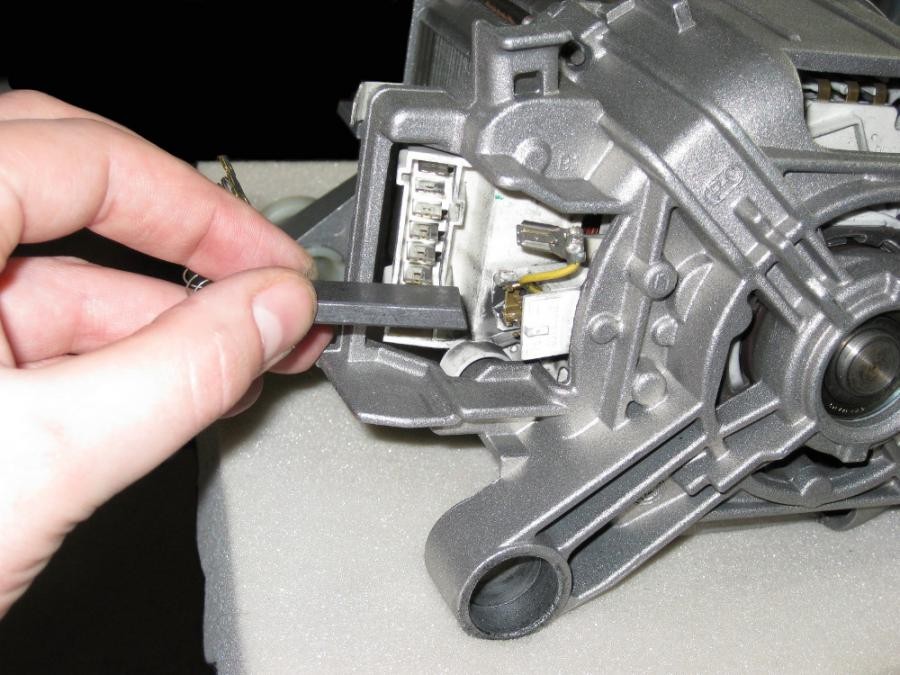
Locate the brushes on your washing machine. They are usually found on the motor, which is typically located at the bottom of the machine. You may need to remove the back panel or rear access panel to access the motor.
3. Remove the old brushes
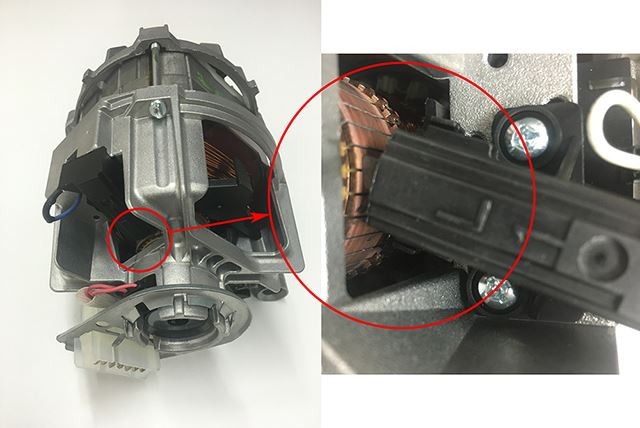
Using a screwdriver or a designated tool, carefully remove the screws that are holding the brushes in place. Gently pull out the brushes from their holders. Pay attention to the positioning of the brushes as you will need to install the new ones in the same way.
4. Install the new brushes
Take your new brushes and align them with the holders. Make sure that they are inserted correctly and securely. Once they are in position, fasten the screws to secure them in place.
5. Reassemble the washing machine
Put the back panel or rear access panel back in place, making sure it is securely fastened. Double-check all connections and screws to ensure everything is properly tightened.
6. Test the machine
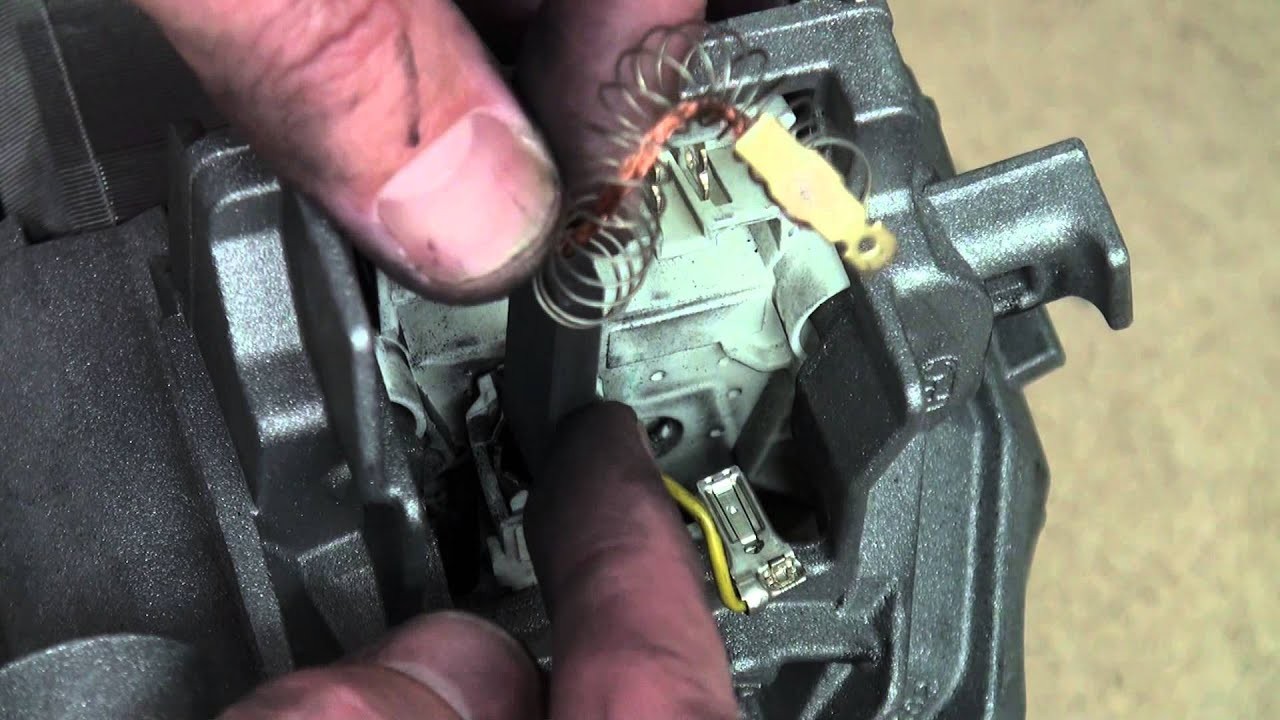
Once everything is reassembled, reconnect the power supply and turn on the washing machine. Run a test cycle to ensure that the new brushes are functioning properly, without any unusual noises or issues.
By following these steps, you can easily replace the brushes on your washing machine and keep it running efficiently for years to come.
Tips for Prolonging the Lifespan of Brushes
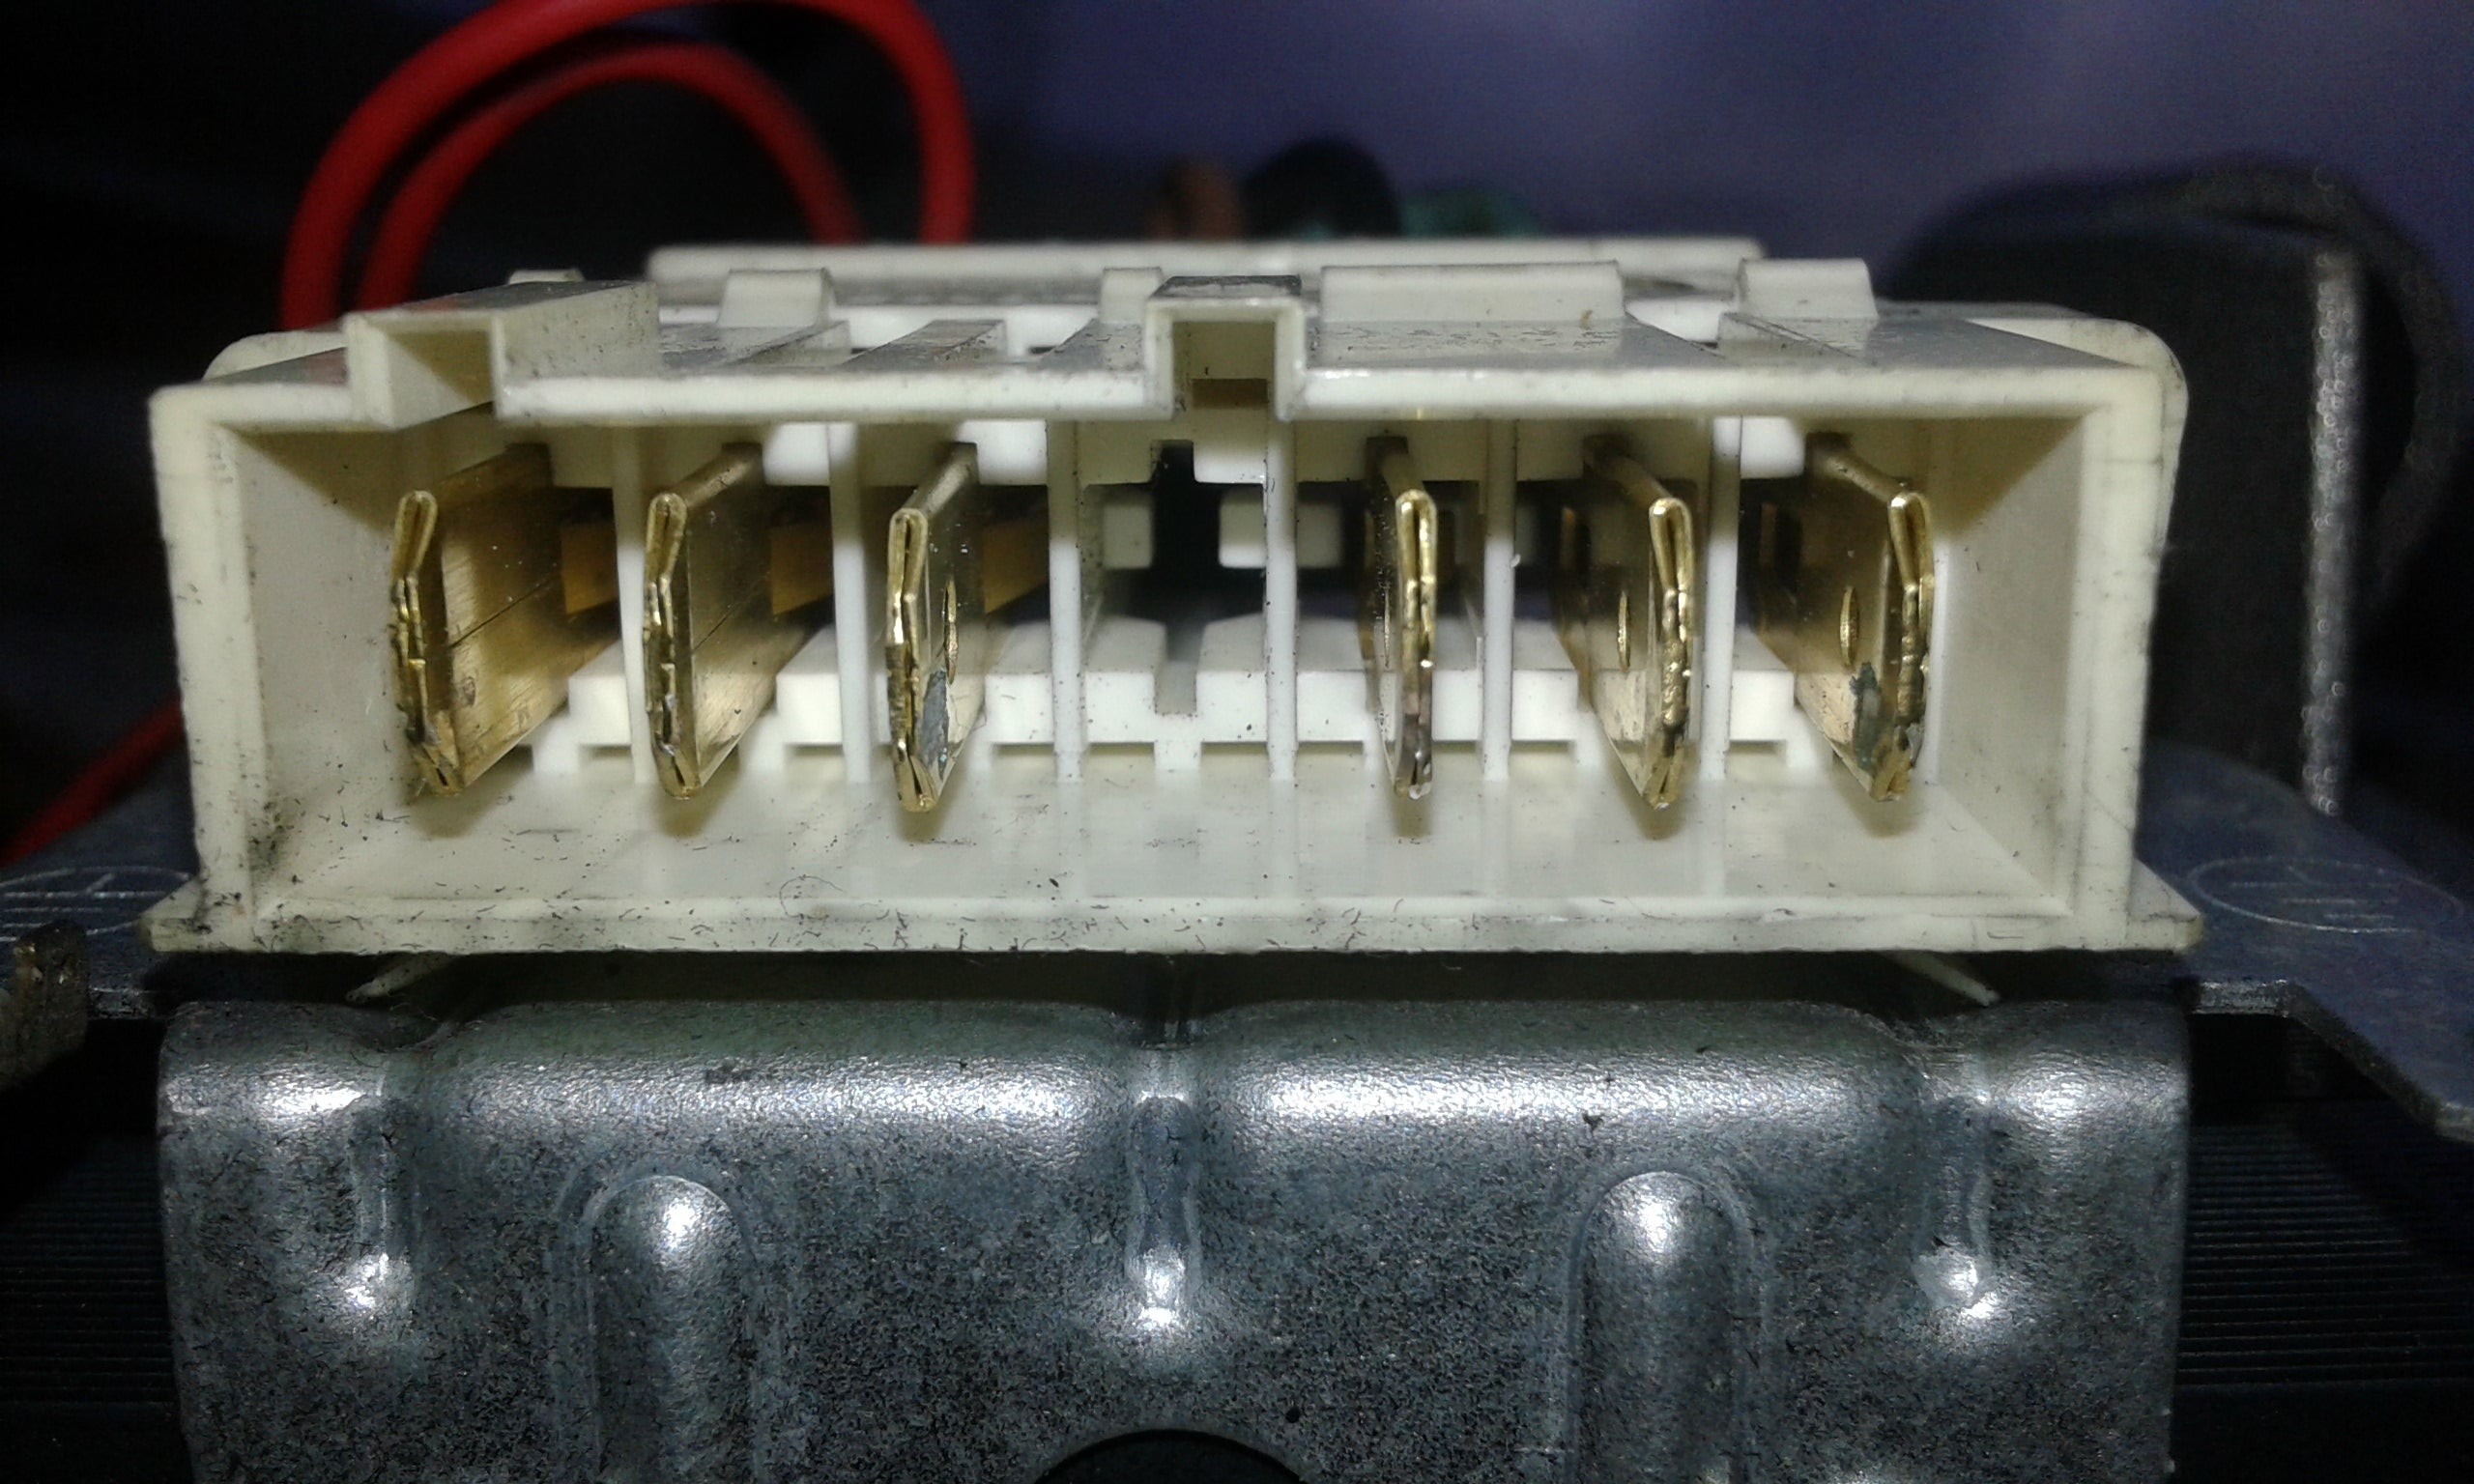
Regular maintenance and proper care can help extend the lifespan of the brushes in your washing machine. Here are some tips to help you keep your brushes in good condition for longer:
| 1. | Keep the brushes clean: |
| Regularly check for any dirt or debris that may have accumulated on the brushes. Use a soft brush or cloth to gently clean them. Avoid using harsh chemicals or abrasive materials, as they can damage the brushes. | |
| 2. | Inspect for wear and tear: |
| Periodically examine the brushes for any signs of wear and tear, such as fraying or excessive wear. If you notice any damage, it is important to replace the brushes as soon as possible to prevent further damage to your washing machine. | |
| 3. | Check for proper alignment: |
| Ensure that the brushes are properly aligned and making good contact with the commutator. Misalignment can cause uneven wear and reduce the effectiveness of the brushes. Adjust the brushes if necessary. | |
| 4. | Avoid overloading the washing machine: |
| Overloading the washing machine can put excessive strain on the brushes, leading to premature wear. Follow the manufacturer’s guidelines for maximum load capacity and avoid overloading the machine. | |
| 5. | Use the appropriate washing cycle: |
| Using the correct washing cycle for each load can help reduce the strain on the brushes. Selecting a cycle that matches the clothing type and level of dirtiness can help prevent unnecessary wear on the brushes. | |
| 6. | Avoid excessive heat: |
| High temperatures can cause the brushes to deteriorate faster. Avoid running the washing machine on high-temperature cycles unless necessary. |
By following these tips, you can help prolong the lifespan of the brushes in your washing machine and ensure optimal performance. Remember to regularly check and replace the brushes when needed to maintain the overall efficiency of your washing machine.
Video on the topic
A Massive Winter Update – Severe Cold and Major East Coast Snowstorms!
How to Replace the Carbon Brushes on a Washing Machine (Hoover)
Carbon brushes logic washing machine
How to Replace Carbon Brushes on a Washing Machine (Bosch)
Answers to frequently asked questions
Read more practical tips and expert opinions about modern devices at appliances-news.com. Here you will find answers to questions about any technology.