
Welcome to our ultimate DIY tutorial on how to disassemble an LG washing machine! If you’re experiencing issues or simply want to give your machine a thorough cleaning, this step-by-step guide will walk you through the process. With our detailed instructions and helpful tips, you’ll be able to tackle this task with confidence and save money on costly repairs or professional services.
Before you begin, it’s important to note that disassembling a washing machine can be a complex task, so it’s essential to follow each step carefully. We recommend consulting your LG washing machine’s user manual for specific instructions related to your model. However, this guide will provide you with a general overview of the process and common steps involved.
Throughout this tutorial, we’ll provide you with tips and precautions to ensure your safety and prevent any damage to your machine. Additionally, we’ll highlight key tools you’ll need for the job and offer insights into potential challenges you may encounter along the way. Get ready to dive into the world of appliance repair as we embark on this exciting journey of disassembling an LG washing machine!
- Step-by-Step Guide: How to Disassemble an LG Washing Machine – Your Ultimate DIY Tutorial
- Tools and Materials You Will Need
- Step 1: Safety Precautions
- Step 2: Access the Control Panel
- Step 3: Remove the Top Panel
- Step 4: Disassemble the Front Panel
- Step 5: Detach the Drum
- Step 6: Clean and Inspect
- Step 7: Reassemble the Washing Machine
- Gathering the Necessary Tools
- 1. Screwdriver Set
- 2. Pliers
- 3. Adjustable Wrench
- 4. Socket Set
- 5. Safety Gloves
- 6. Safety Glasses
- 7. Container for Small Parts
- Preparing the Washing Machine for Disassembly
- Disassembling the LG Washing Machine
- Troubleshooting and Reassembling
- Video on the topic
- Successful Removal of LG Washer stuck pulsator wash plate
- THIS WAS A LOT OF WORK! | Teardown & Deep Clean a Front Load Washer Tub
- LG Washer Repair – How to Replace the Spider Assembly (LG # 4434ER0003C)
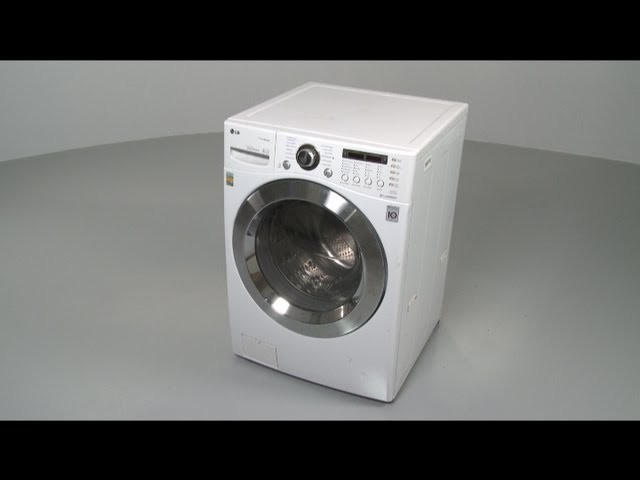
- LG Front-Load Washer Disassembly (Model # WM3360HWCA) – Washing Machine Repair Help
- How to remove an LG washing machine pulsator #appliances
- Answers to frequently asked questions
Step-by-Step Guide: How to Disassemble an LG Washing Machine – Your Ultimate DIY Tutorial

Welcome to our step-by-step guide on how to disassemble an LG washing machine. Whether you need to perform routine maintenance, replace a faulty part, or simply satisfy your curiosity, this DIY tutorial will walk you through the process.
Tools and Materials You Will Need
Before you get started, gather the following tools and materials:
- Phillips screwdriver
- Flathead screwdriver
- Adjustable wrench
- Pliers
- Socket set
- Cleaning brush
- Replacement parts (if necessary)
Step 1: Safety Precautions

Before beginning any disassembly, always ensure your safety by unplugging the washing machine from the power source. It is also advisable to wear protective gloves and goggles to prevent any accidents.
Step 2: Access the Control Panel
Locate the screws holding the control panel in place, usually located at the back or sides. Use a screwdriver to remove the screws and gently lift off the control panel.
Step 3: Remove the Top Panel

Once the control panel is removed, locate the screws securing the top panel and use a screwdriver to unscrew them. Once all screws are removed, lift off the top panel and set it aside.
Step 4: Disassemble the Front Panel

Remove any screws holding the front panel in place and set them aside. Carefully lift off the front panel and disconnect any wires or cables attached to it. Set the front panel aside.
Step 5: Detach the Drum

At this point, you should have access to the inner components of the washing machine. Locate the drum and remove any screws or bolts securing it in place. Use an adjustable wrench or pliers to disconnect any hoses or pipes connected to the drum. Once all connections are detached, carefully lift out the drum.
Step 6: Clean and Inspect
With the drum removed, take the opportunity to clean and inspect all internal components. Use a cleaning brush to remove any dirt or debris, and check for any signs of damage or wear. If any parts need to be replaced, now is the time to do so.
Step 7: Reassemble the Washing Machine

Once you have cleaned and inspected all components, simply follow the previous steps in reverse order to reassemble your LG washing machine. Make sure all screws, bolts, wires, and connections are securely in place.
Remember, if you are unsure about any step or encounter any difficulties during the process, consult the LG washing machine’s user manual or seek assistance from a professional technician.
That concludes our step-by-step guide on how to disassemble an LG washing machine. We hope you found this tutorial helpful and were able to successfully complete the disassembly process.
Gathering the Necessary Tools
Before you begin the process of disassembling your LG washing machine, it is important to gather all the necessary tools and equipment. Having the right tools at hand will make the disassembly process easier and more efficient. Here is a list of the tools you will need:
1. Screwdriver Set
- Phillips screwdriver
- Flathead screwdriver
2. Pliers

You may need pliers to remove certain components or to disconnect wiring. Make sure you have a reliable pair of pliers with a comfortable grip.
3. Adjustable Wrench
An adjustable wrench is essential for loosening and tightening nuts and bolts. Choose one that fits comfortably in your hand and can be adjusted to different sizes.
4. Socket Set
A socket set will come in handy when disassembling some parts of the LG washing machine. Look for one with a variety of socket sizes to ensure you have the right fit.
5. Safety Gloves

It is important to protect your hands during the disassembly process. Safety gloves will provide a barrier between your skin and any sharp edges or electrical components.
6. Safety Glasses

Safety glasses are necessary to protect your eyes from any potential debris or flying particles while taking apart the washing machine.
7. Container for Small Parts

As you disassemble the machine, you may come across small screws, nuts, or washers. It is crucial to have a container or tray to keep these parts organized and prevent them from getting lost.
Make sure you have all of these tools and equipment ready before you start the disassembly process. Having everything prepared will save you time and ensure a smoother process overall.
Preparing the Washing Machine for Disassembly

Before you begin disassembling your LG washing machine, it is important to take some necessary precautions to ensure your safety. Make sure to follow these steps:
Step 1: Safety First
Turn off the washing machine and unplug it from the power source. This will prevent any accidents or injuries while you are working on the machine.
Step 2: Gather Tools
Collect all the necessary tools you will need for the disassembly process. This may include screwdrivers, pliers, and a socket wrench set. Having all the tools ready will help to streamline the process and save you time later on.
Step 3: Drain the Washing Machine
If your LG washing machine has any water remaining in it, you will need to drain it before disassembly. Follow the manufacturer’s instructions to safely drain the water. This may involve using a drain hose or a drain pump.
Step 4: Prepare the Work Area
Find a clean and spacious work area where you can disassemble the washing machine. Make sure the area is well-lit and has enough space to accommodate the disassembled parts. Lay down a protective covering such as a tarp or cardboard to prevent any damage to the flooring.
Step 5: Disconnect Water Supply and Hoses
Locate the water supply hoses connected to the back of the washing machine. Turn off the water supply valves and disconnect the hoses. Use pliers if necessary to loosen any tight connections.
Step 6: Remove the Back Panel
Most LG washing machines have a removable back panel that provides access to the internal components. Use a screwdriver to remove the screws securing the back panel and carefully take it off. Keep the screws in a safe place to prevent them from getting lost.
| Note: | These steps are general guidelines and may vary depending on the model and type of LG washing machine you have. Refer to your owner’s manual or manufacturer’s instructions for specific disassembly information. |
|---|
By following these preparatory steps, you can ensure a smooth and safe disassembly process for your LG washing machine. Now you are ready to move on to the next steps of dismantling the machine.
Disassembling the LG Washing Machine

Disassembling an LG washing machine may seem daunting, but with the right tools and instructions, it can be a manageable DIY task. Before starting the disassembly process, make sure to disconnect the washing machine from the power source and turn off the water supply to prevent any accidents.
Here is a step-by-step guide on how to disassemble an LG washing machine:
Step 1: Remove the Control Panel
The first step is to remove the control panel. Start by removing the screws on the back of the panel using a screwdriver. Once the screws are removed, gently pull the control panel towards you and disconnect any wiring connected to it. Set the control panel aside.
Step 2: Remove the Top Panel
After removing the control panel, locate the screws that hold the top panel in place. Use a screwdriver to remove these screws and set them aside. Gently lift the top panel off the washing machine and set it aside.
Step 3: Remove the Front Panel and Door
Next, remove the front panel and door of the washing machine. Start by removing the screws at the top and bottom of the front panel. Once the screws are removed, carefully lift the front panel off the machine and set it aside. Disconnect any wiring or hoses connected to the front panel if necessary.
Step 4: Remove the Tub and Drum
Now it’s time to remove the tub and drum of the washing machine. Begin by disconnecting any hoses or connections to the tub. Use a wrench to remove the bolts that hold the tub and drum in place. Carefully lift the tub and drum out of the washing machine and set them aside.
Step 5: Remove the Motor and Other Components
Once the tub and drum are removed, you can proceed to remove the motor and other components. Detach any wiring connected to the motor and screws that hold it in place. Remove any other components as needed, following the manufacturer’s instructions or consulting a repair manual.
Remember to keep track of all the screws and components you remove throughout the disassembly process. This will make reassembly easier later on. Additionally, take note of the order in which you remove the parts, as this will help when putting the washing machine back together.
Disassembling an LG washing machine requires patience and careful attention to detail. Always refer to the manufacturer’s instructions or consult a professional if you are unsure about any step of the process. Once you have successfully disassembled the machine, you can clean, repair, or replace any necessary parts before reassembling it.
Troubleshooting and Reassembling
After successfully disassembling your LG washing machine, it’s important to troubleshoot and reassemble it properly to ensure it functions correctly. Here are some common issues you may encounter during the reassembling process and how to troubleshoot them:
1. Misaligned Parts: While putting the machine back together, it’s possible for some parts to become misaligned or not fit correctly. Carefully inspect each piece and make sure it is properly aligned and seated in its designated spot. Adjust as necessary to ensure a smooth reassembly process.
2. Damaged Components: During disassembly or handling, it’s possible for certain components to get damaged. Inspect all parts for any signs of damage, such as cracks or breaks. If any parts are damaged, it’s necessary to replace them before reassembling the machine.
3. Incorrect Assembly Order: It’s crucial to follow the disassembly steps in reverse order to reassemble the washing machine correctly. If you find yourself stuck or unsure about the assembly order, refer back to your documentation or take pictures during the disassembly process to help you get everything back in the right place.
4. Loose Connections: Ensure that all electrical connections and hoses are securely fastened and tightened during reassembly. Loose connections can lead to improper functioning or even potential hazards. Double-check each connection to ensure a secure fit.
5. Testing and Fine-tuning: After reassembling, it’s important to test the washing machine before using it. Run a short cycle and observe the operation to make sure everything is functioning as it should. Pay attention to any strange noises, leaks, or error codes. If any issues arise, consult the documentation or seek professional assistance.
By troubleshooting and addressing any problems during reassembly, you can ensure that your LG washing machine is properly put back together and ready to deliver efficient and reliable performance.
Video on the topic
Successful Removal of LG Washer stuck pulsator wash plate
THIS WAS A LOT OF WORK! | Teardown & Deep Clean a Front Load Washer Tub
LG Washer Repair – How to Replace the Spider Assembly (LG # 4434ER0003C)
LG Front-Load Washer Disassembly (Model # WM3360HWCA) – Washing Machine Repair Help
How to remove an LG washing machine pulsator #appliances
Answers to frequently asked questions
Read more practical tips and expert opinions about modern devices at appliances-news.com. Here you will find answers to questions about any technology.


